
Advice › Project examples
Soundproofing & Insulation Examples
Real InShop projects on vans, campervans and vintage cars. Each one shows the steps we took and the exact materials we used, so you can get the same result.
How much will you need? Measure the areas you want to cover and send them to us: we’ll help you work out the quantities. WhatsApp +353 83 088 8713 · info@inshop.ie · or see coverage per sheet.
Tap a project to open it.
Vans & campervans
Van door cardLayer 1: 1.5mm mat · Layer 3: 12mm felt
Materials used
Step by step
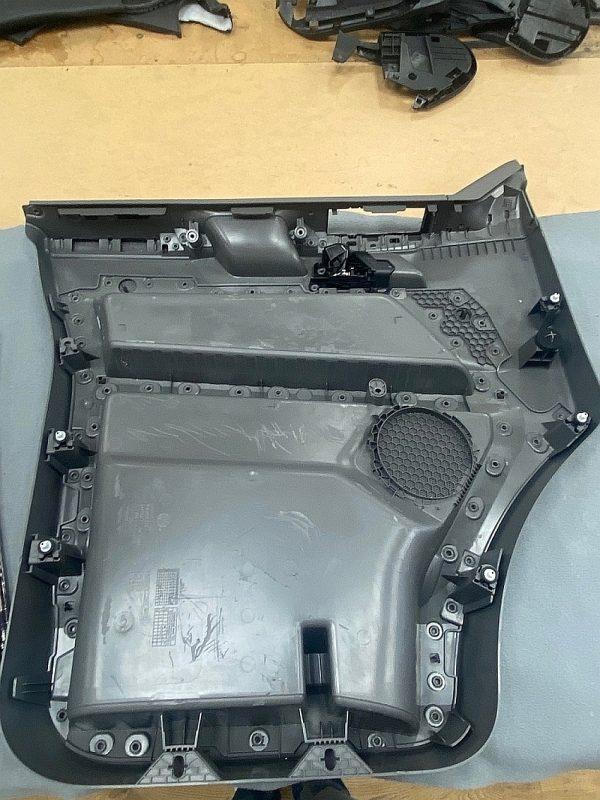
Remove the plastic door card and clean it with isopropyl alcohol (test a hidden spot first; strong thinners can damage plastic). Don’t use white spirit: it leaves a greasy residue.
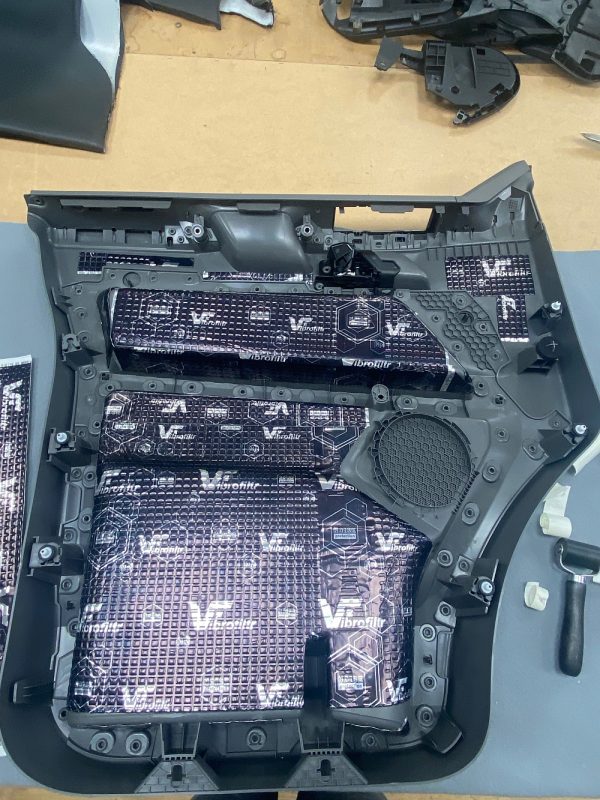
First layer: 1.5mm sound deadening mats on most of the flat surfaces. To be effective, mats should cover at least 50% of the area.
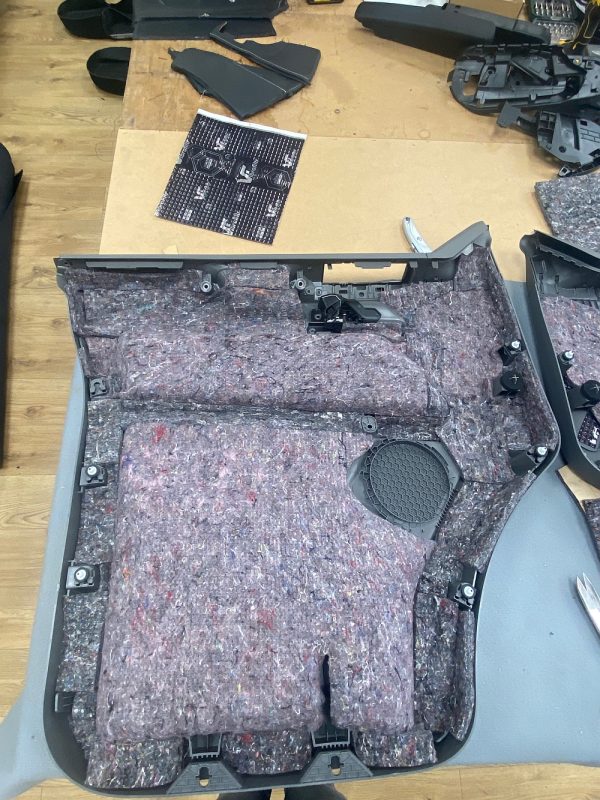
Second layer: 12mm acoustic felt over the entire surface. You can add several layers of felt to fill deeper gaps and crevices.
Van door frameLayer 1: 1.5mm mat · Layer 2: 6mm ST-Mat
Materials used
Step by step
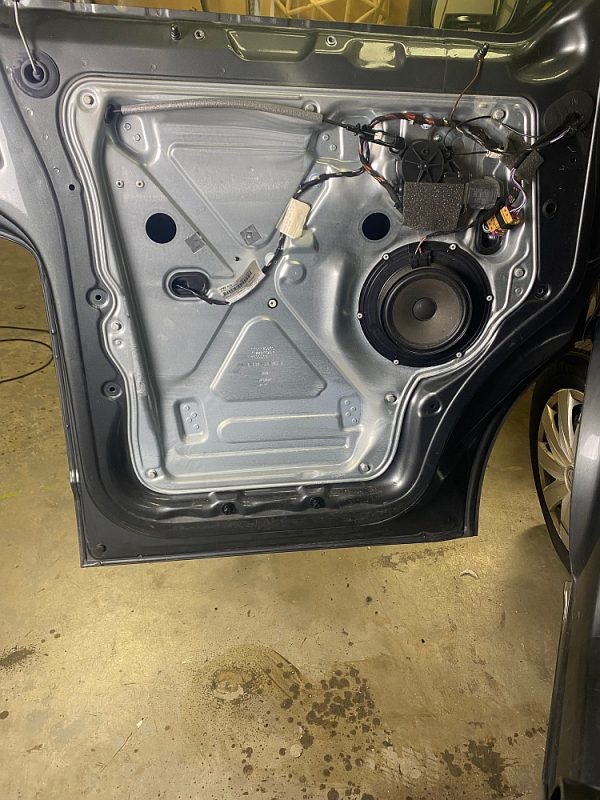
Remove the plastic door card.
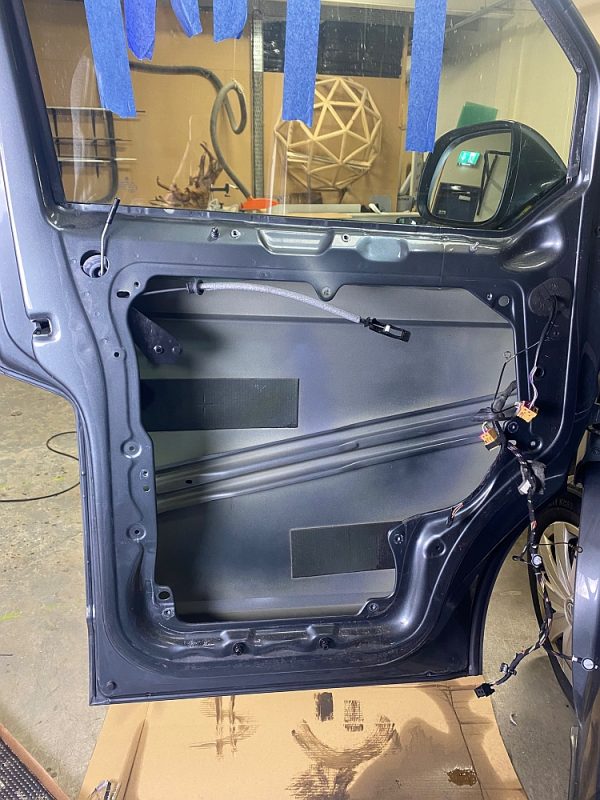
Remove the metal partition and raise the window to reach the very back of the door.
This area is often covered with a layer of wax. If so, clean it off thoroughly with paint thinners or an alcohol-based cleaner.
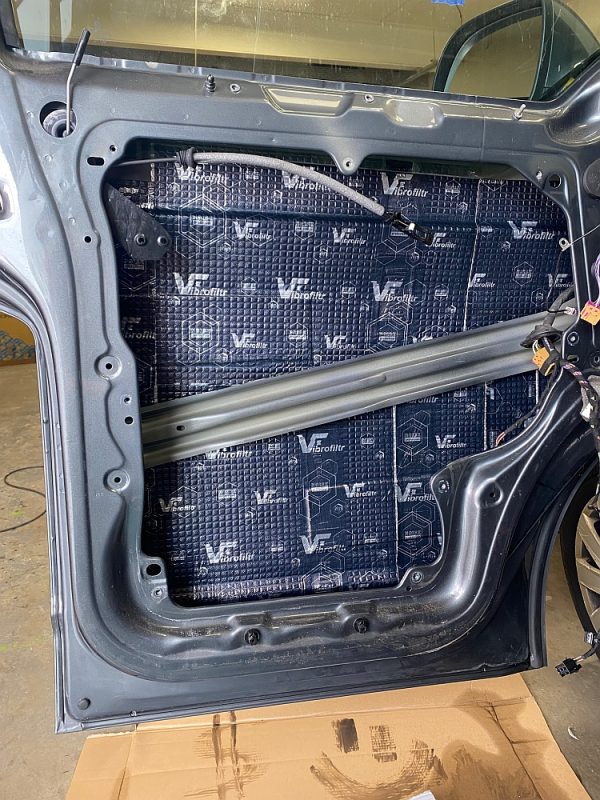
1.5mm sound deadening mat applied to the inside of the door, to reduce vibration and drumming.
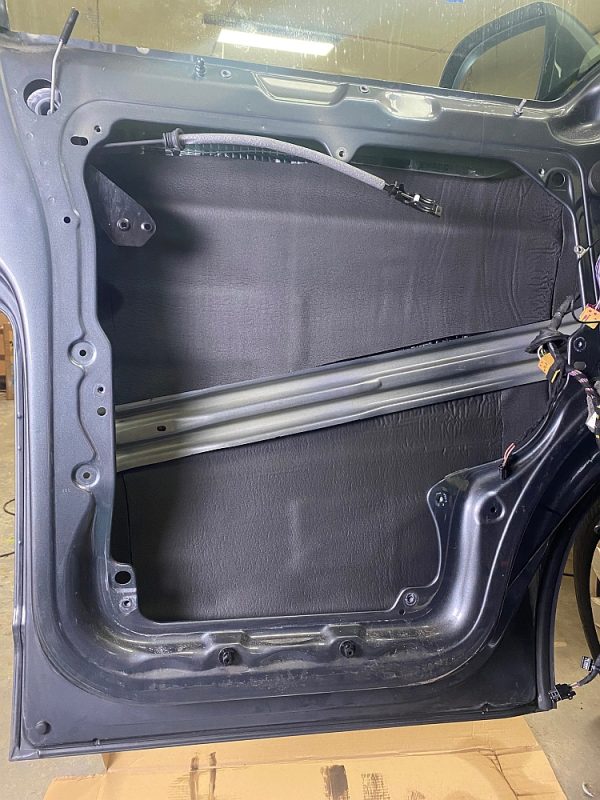
Second layer: 6mm ST-Mat for sound and thermal insulation. If you have the space, use a thicker mat: in general, the thicker the insulation, the better the result.
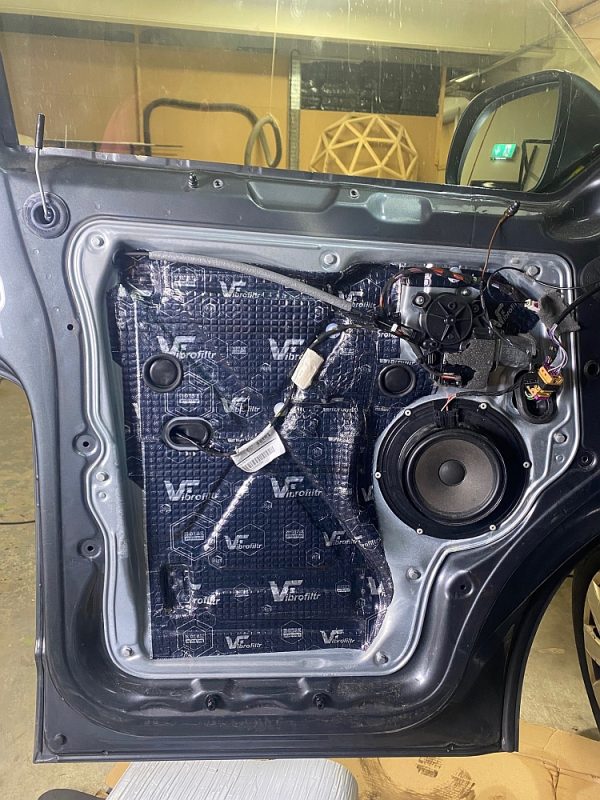
Cover the metal partition with 1.5mm mat and reattach it. There wasn’t enough space for ST-Mat here, so it was left out.
Before refitting the trim, check the window winds fully up and down and that the drain holes at the bottom of the door are clear.
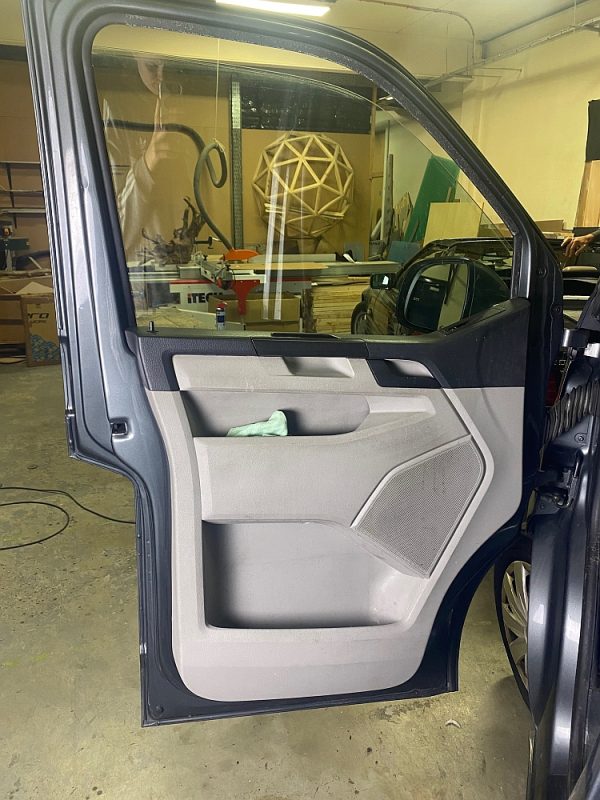
Finally, reattach the plastic door card.
Van floor (corrugated)Layer 2 only: 6mm ST-Mat strips + 3mm ST-Mat
Materials used
Step by step
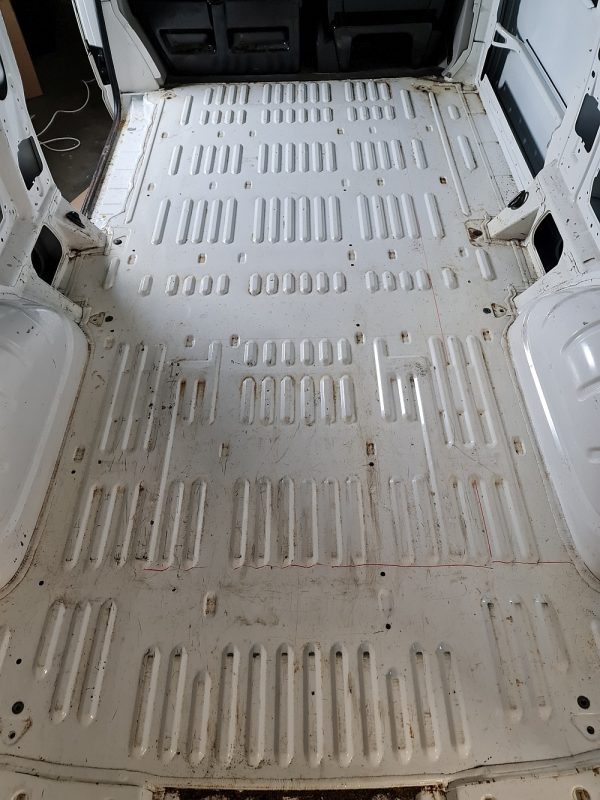
A corrugated van floor doesn’t need sound deadening mats: the corrugated profile helps stop vibration.
For insulation there are three methods. 1: 3mm ST-Mat over the whole floor. Don’t use thicker foam without support: it compresses over time and the plywood floor bends. 2: fit wooden battens, put thicker insulation between them, then fit the plywood. 3: no battens, but thicker insulation: strips between the ribs (as thick as the ribs are high), then 3mm over everything.
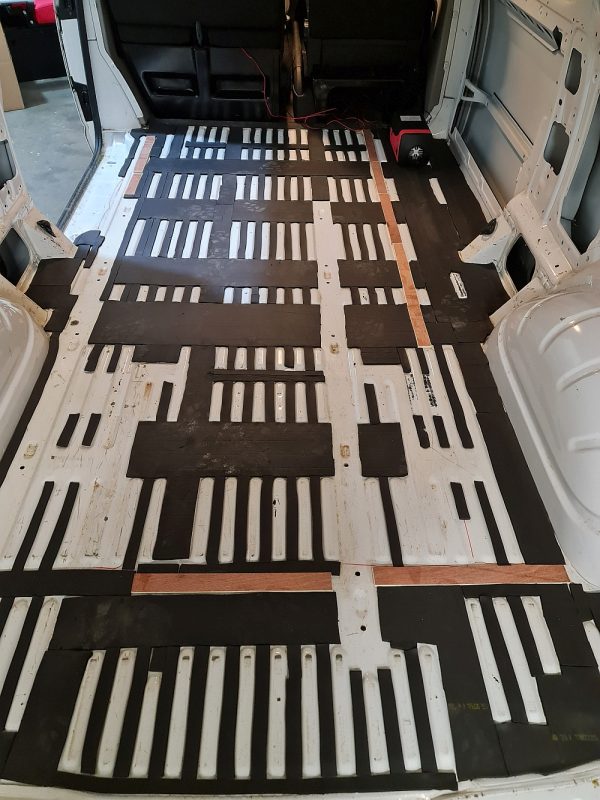
This project used method 3: 6mm ST-Mat cut into strips and fitted between the corrugated metal ribs.
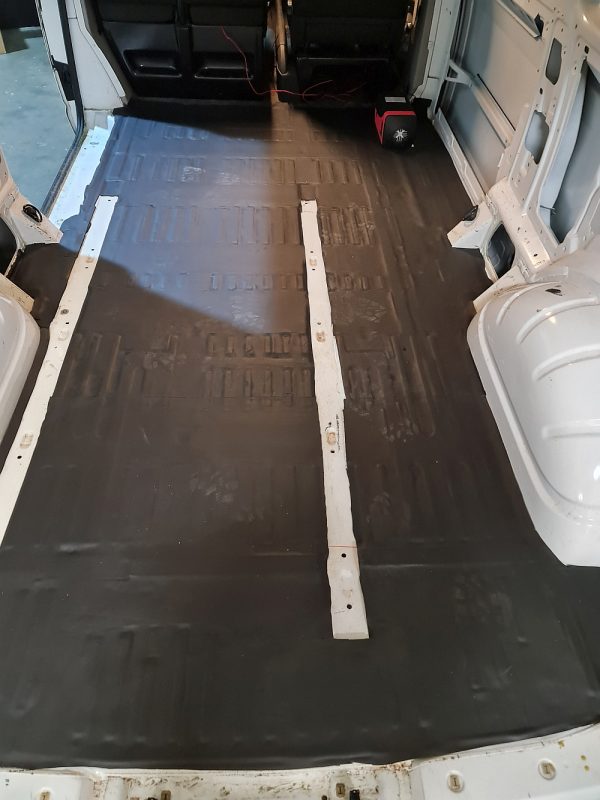
Finally, 3mm ST-Mat over the entire floor.
Van wheel arches & side panelsLayer 1: 2mm mat · Layer 2: 10mm ST-Mat
Materials used
Step by step
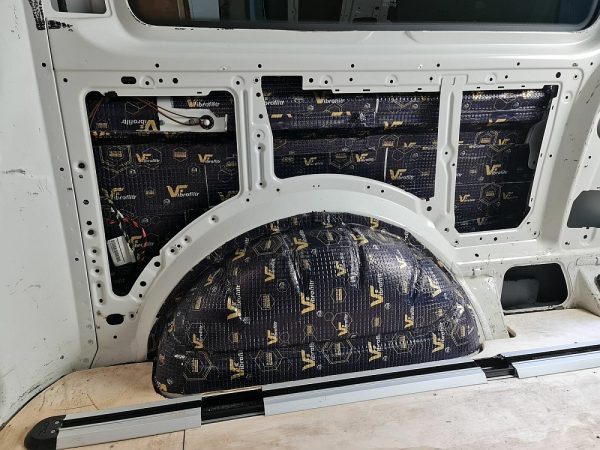
In vans and campervans most road noise comes from the wheel arches and the side panels around them, so we recommend thicker sound deadening mats. This project used 2mm mats.
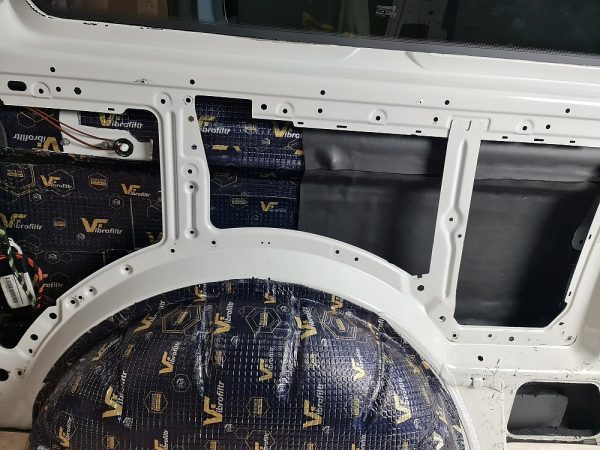
Second layer: 10mm ST-Mat inside the side panel.
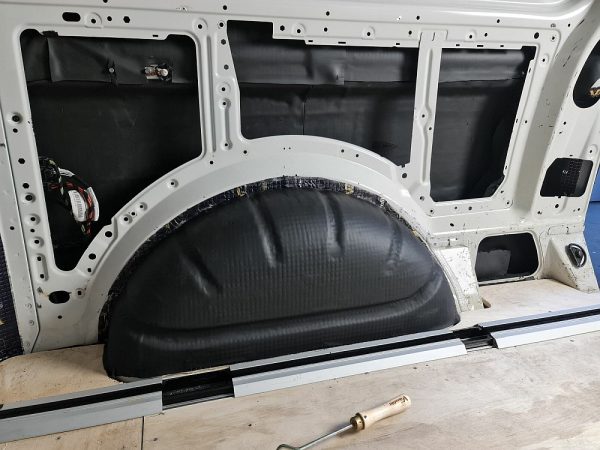
The same 10mm ST-Mat on the wheel arches.
Vintage cars
Under the bonnet (vintage car)Layer 2: 10mm fire-retardant ST-Mat
Materials used
Step by step
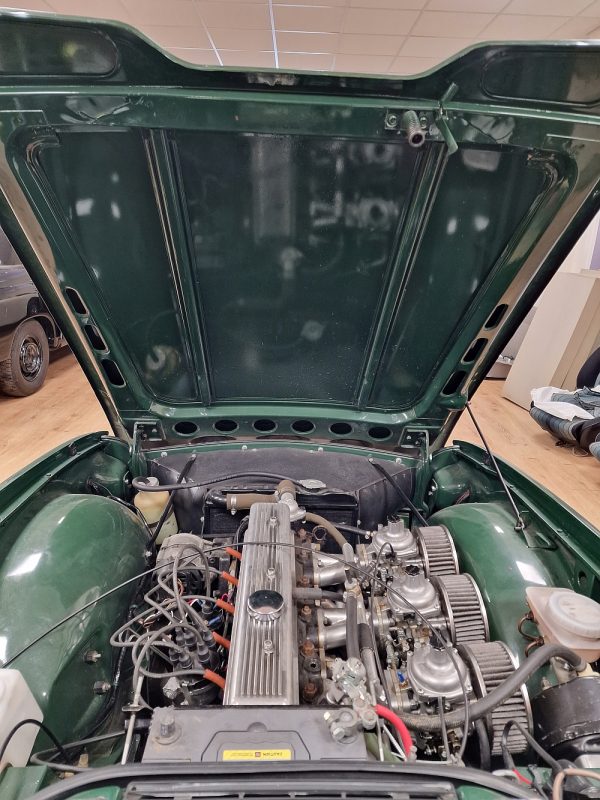
Clean the metal under the bonnet.
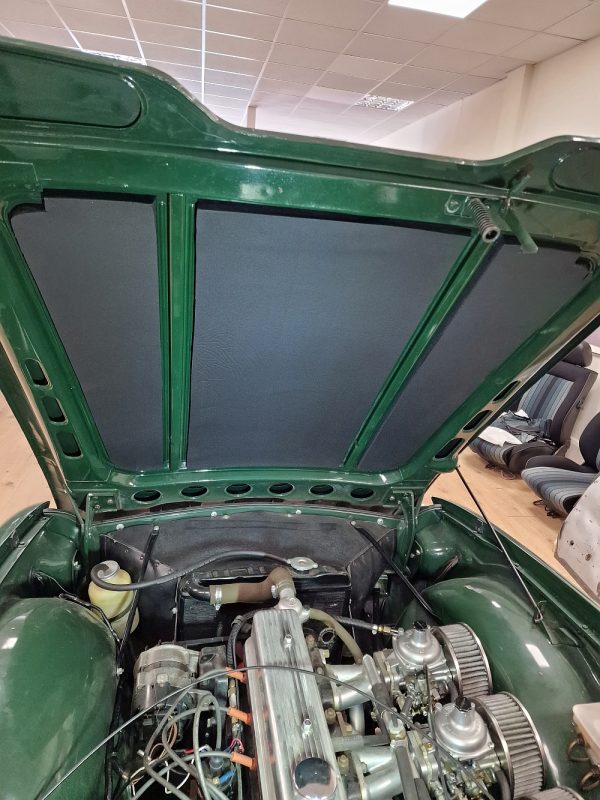
Fit 10mm fire-retardant ST-Mat for sound and thermal insulation.
The adhesive is very sticky: cut the exact shape first, stick down one corner, then slowly remove the rest of the backing.
Tip: keep the foam well away from the exhaust side and clear of the bonnet catch and hinges. On a modern car with a hot engine bay, use a foil-faced engine-bay liner instead.
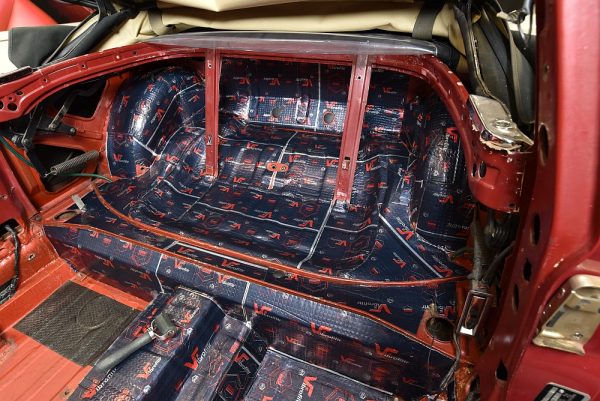
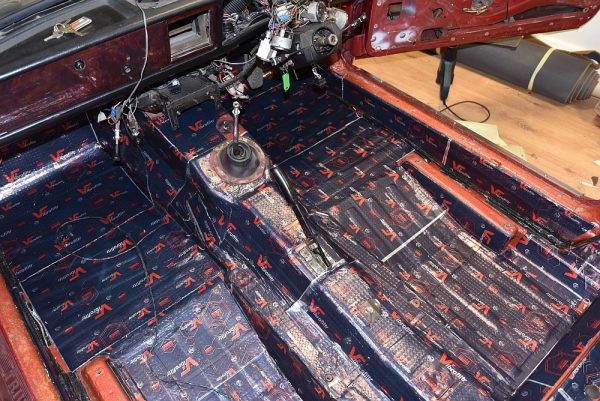
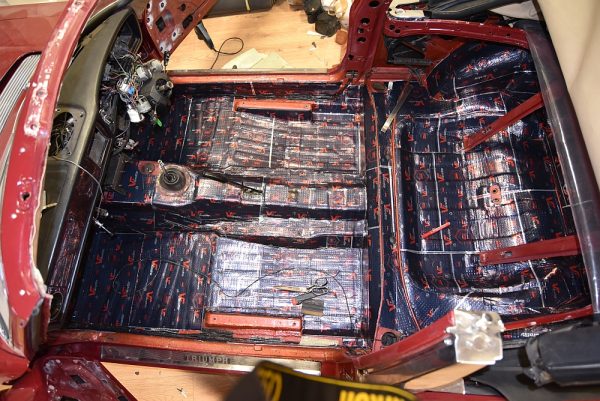
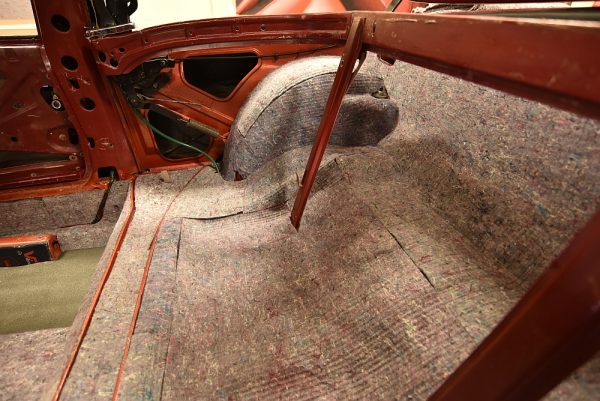
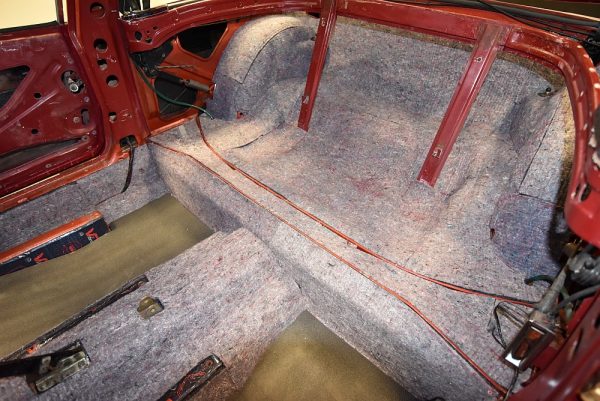
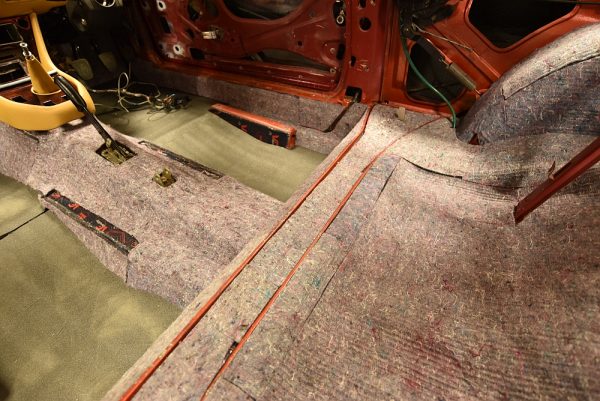
Full interior (car)Layer 1: 4mm mat · Layer 2/3: 8mm PPE ECO + 12mm felt
Materials used
Step 1: sound deadening mats
4mm sound deadening mats over the entire floor and the back-seat area. The floor is where most of the noise comes from in this kind of vehicle, so thicker mats were used. In general, the thicker the mat, the more soundproofing, but mats also add weight.
Step 2: felt and PPE ECO foam
12mm acoustic felt on the back-seat area, wheel arches and transmission tunnel, to absorb high-frequency sound. 8mm PPE ECO on the floor as an insulating layer; it can only go on flat surfaces.
RoofLayer 1: 2mm mat · Layer 3: 8mm felt
Materials used
Step by step
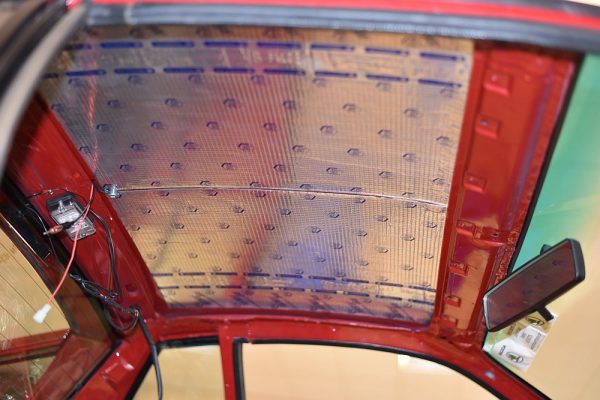
2mm sound deadening mat on the roof. Less noise comes from the roof, so thinner mats can be used.
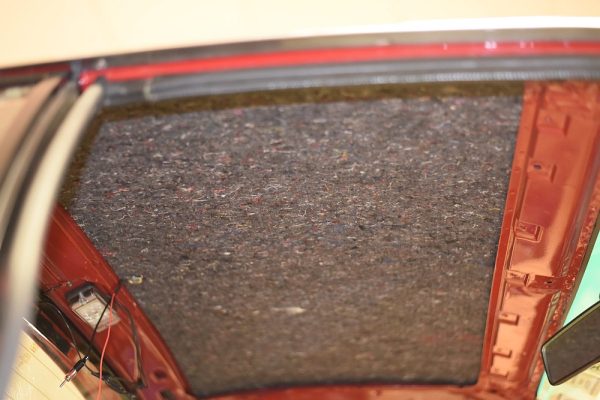
Second layer: 8mm acoustic felt to absorb unwanted sound.
Planning your own project? Start with the 3-layer method, then follow the fitting steps.
Which product for which jobInstallation guideShop all materials
- Stocked in KilkennyShipped from our premises at Hebron Industrial Estate
- Ships immediatelyIn-stock orders placed before 3pm Mon–Fri leave the same day · Delivery
- Trade customers welcomeApply for a trade account
- Help on WhatsApp+353 83 088 8713 · Mon–Fri 10am–5pm